


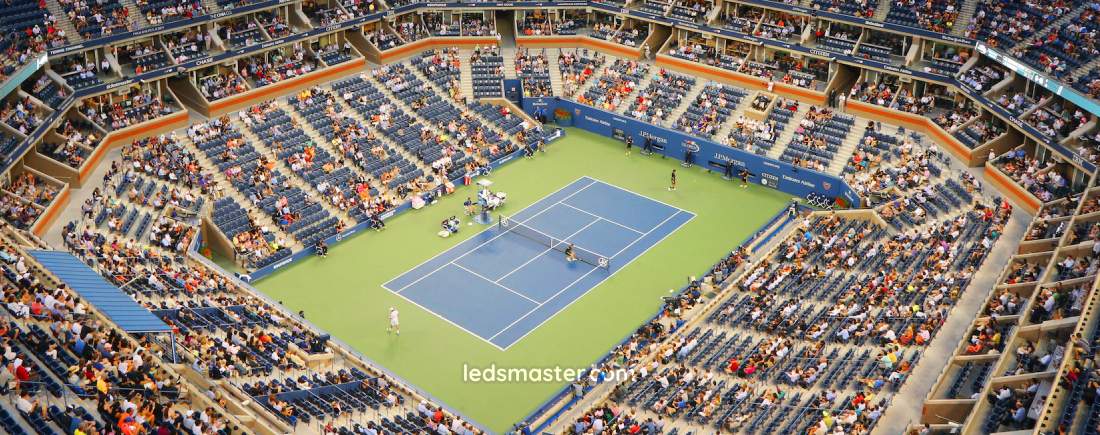
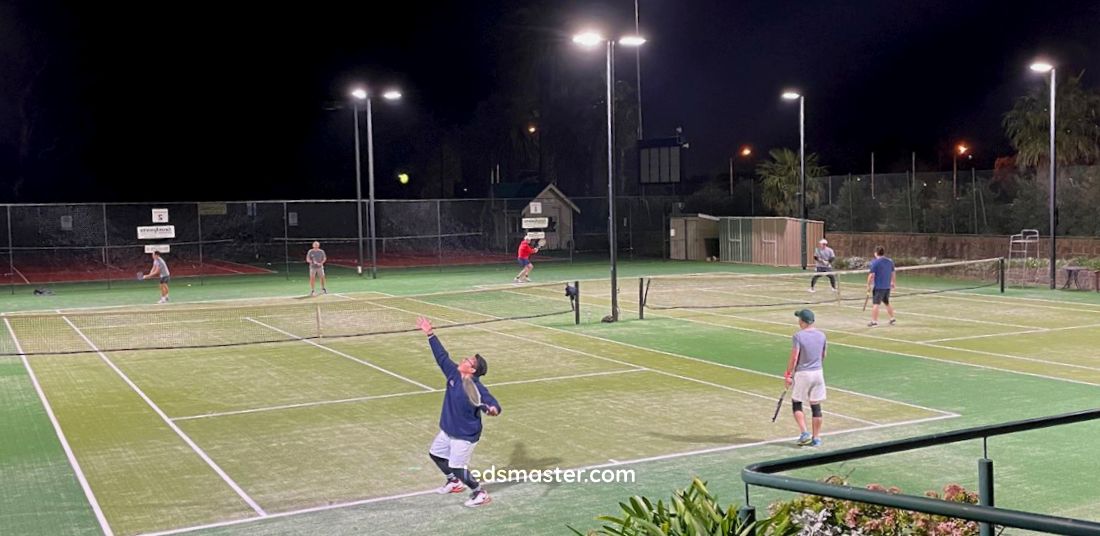
When it comes to tennis court lighting, it’s not just about throwing a few bright fixtures around and calling it a day. There’s actually quite a bit of lighting science behind making a court feel right. The goal isn’t only to see the ball—it’s to make sure every inch of the court is evenly visible, comfortable for the eyes, and meets the right illumination standards. Whether it’s a casual night match between friends or a competitive tournament, good lighting can completely change the experience.
| Category | Specification | Typical Range / Standard | Notes |
|---|---|---|---|
| Ball Speed (Pro Games) | — | ≈ 200 km/h (124 mph) | Helps define visibility needs |
| Brightness (Lux / Foot-Candles) | Recreational Play | 300–500 lux (30–50 fc) | Comfortable for casual matches |
| Club / Tournament Play | 700–1000 lux (65–90 fc) | Standard for competition courts | |
| Professional / Broadcast | 1300–1500 lux (120–140 fc) | Needed for HD/TV clarity | |
| High-Speed Broadcast Standard (ITF/CIE) | Up to 2000 lux | For international pro matches | |
| Uniformity Ratio | Minimum ÷ Average | ≥ 0.7 | Ensures even light distribution |
| Color Temperature (Kelvin) | Warm White | < 3500K | Too yellow for ball visibility |
| Neutral / Cool White (Typical) | 4000K–5000K | Feels like natural daylight | |
| Optimal for Ball Contrast | 5000K–5700K | Enhances reaction speed by 15–20% | |
| Too Cool / Harsh | > 6000K | May cause visual discomfort | |
| CRI (Color Rendering Index) | Recreational | ≥ 70 | Acceptable for community courts |
| Club / Competition | 80–90 | Ideal for accurate color visibility | |
| Broadcast / Professional | > 90 | Required for TV and photography | |
| Glare Control (UGR / GR) | Unified Glare Rating | < 22 | Keeps light comfortable for players |
| Pole Height | Standard Range | 8–12 meters (26–40 ft) | Adjust depending on court type |
| Fixture Tilt Angle | — | 20–25° downward | Prevents glare and light spill |
| Beam Angle Options | — | 30°–90° | Used for different court layouts |
| Color Consistency (SDCM) | — | ≤ 3 SDCM | Prevents uneven color tones |
| Light Spill Regulation | Property Boundary | ≤ 5 lux at 10 m | Common local limit for outdoor courts |
Let’s start with brightness, or what lighting designers call illuminance. It’s usually measured in lux (lumens per square meter) or foot-candles (fc) in the U.S. For tennis, you need enough brightness so the ball is visible at high speeds—remember, a tennis ball can travel over 200 km/h (124 mph) in pro games.
For recreational play, around 300–500 lux (roughly 30–50 foot-candles) usually feels comfortable and bright enough. This level gives a nice balance for players without wasting energy.
If you’re setting up lighting for a club-level or tournament court, the standard jumps up to about 700–1000 lux (around 65–90 fc). That extra brightness helps players react faster and see spin and ball trajectory more clearly.
And for professional or televised matches, the requirements are much stricter. Broadcast-grade lighting typically ranges from 1300 to 1500 lux (120–140 fc) or even higher, because cameras need stronger light for crisp, color-accurate visuals. Some international standards, like ITF or CIE recommendations, even push for 2000 lux for high-speed broadcasting.
So, the brighter, the better? Not necessarily. Over-lighting can create harsh glare or uneven patches. The key is uniformity—keeping the entire court consistently lit.
Uniformity refers to how evenly the light spreads across the court. You’ve probably noticed how annoying it feels to play in a spot that’s brighter on one side and dimmer on the other. Technically, uniformity is expressed as a ratio—the minimum brightness divided by the average brightness.
A good uniformity ratio for tennis courts should be 0.7 or higher, meaning no spot on the court should have less than 70% of the average light level. That creates a balanced, shadow-free surface, so players don’t lose sight of the ball mid-rally.
Modern lighting design software like DIALux or AGi32 can simulate how light spreads before installation. Using a photometric layout helps avoid unevenness and ensures every part of the court—baseline, net, sidelines—gets the same light intensity.
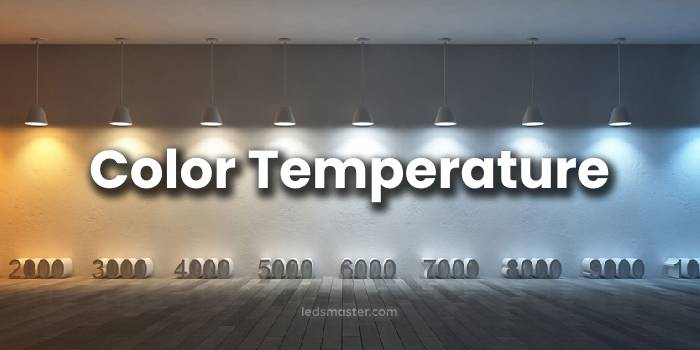
Next, let’s talk about color temperature, measured in Kelvin (K). This determines whether the light looks warm (yellowish) or cool (bluish).
Most tennis courts use neutral to cool white light, around 4000K to 5000K. This range feels similar to daylight—bright, clean, and natural. If you go warmer (below 3500K), the light looks too soft or yellow, which can make it harder to spot the ball against the background. On the other hand, lights that are too cool (above 6000K) may appear harsh or artificial, especially in residential neighborhoods.
Many lighting designers recommend 5000K–5700K for outdoor tennis courts because it mimics daylight conditions and enhances the contrast between the yellow or green ball and the court surface. In one study from sports lighting engineers, players responded 15–20% faster to ball movement under 5000K lighting compared to warmer tones.
Another thing you might hear is CRI, or Color Rendering Index. This measures how accurately a light source shows colors compared to natural daylight. A higher CRI means better color perception—super important when you’re trying to see the difference between the tennis ball, white lines, and background.
A CRI of 70+ is acceptable for community or recreational courts, but if you’re investing in a more serious setup, go for CRI 80–90. That gives a richer, more realistic visual experience, especially for players, coaches, and photographers. For televised matches, CRI above 90 is preferred, as cameras capture details more clearly under high-CRI lighting.
No one wants to be blinded by their own court lights. Glare control is a huge part of tennis lighting design. Glare is caused when the light source is too bright compared to its surroundings, or when the beam angle points directly into a player’s line of sight.
The best way to handle this is by using asymmetric beam optics—that means the lights are designed to throw light forward and downward, not directly outward. It helps keep illumination on the playing area while reducing spillover into nearby properties.
Manufacturers often rate fixtures with a glare rating (GR) or Unified Glare Rating (UGR). For outdoor sports like tennis, keeping a UGR below 22 helps maintain visual comfort.
Another trick is to mount lights at the right height and angle. Most courts use poles between 8 and 12 meters tall, and the fixtures are tilted downward at about 20–25 degrees. That keeps the beams directed onto the court surface, not into players’ eyes.
Some advanced LED fixtures also include anti-glare visors, shields, or reflectors, which further improve player comfort. High-end systems even let you adjust beam spreads—from 30° to 90°—depending on your court layout and whether you’re lighting one court or multiple side by side.
One thing people often forget is color consistency, or how uniform the color tone of each light is. If you mix different brands or batches of fixtures, the court might end up with slightly different shades of white, which looks uneven and distracting. Professional LED systems keep this in check with a tight color tolerance (typically 3 SDCM or less), so every light looks the same.
Especially for outdoor courts near homes, light spill and pollution can become an issue. You don’t want to light up your neighbor’s backyard every time you play at night. To prevent that, it’s best to use fixtures with precision optics, cutoff shields, or even smart lighting controls that dim the lights automatically when not in use.
In some areas, local regulations limit how much light can spill beyond your property line—usually measured in lux at the boundary (for example, less than 5 lux at 10 meters beyond the fence). It’s worth checking before installation to avoid complaints or fines.
At the end of the day, great tennis court lighting is about balance—enough brightness for visibility, enough uniformity for consistency, and the right color temperature for comfort. It’s not just a matter of wattage; it’s about how well your lighting design integrates photometrics, glare control, and visual comfort into one smooth setup.
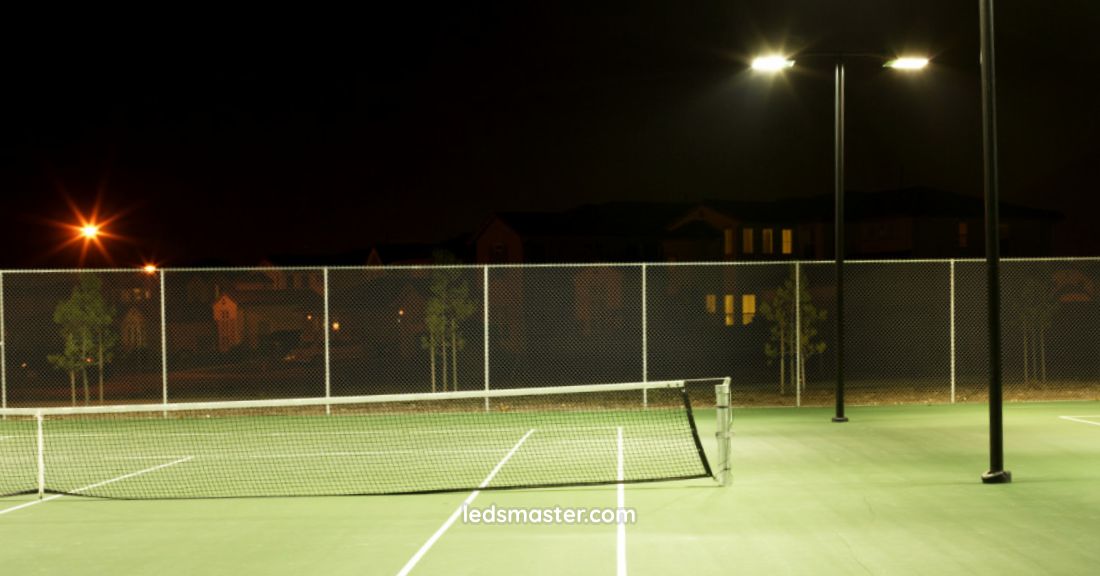
When everything’s dialed in correctly, you get that perfect nighttime playing experience: bright, even, and comfortable lighting where every serve and volley feels clear and effortless.
Lighting poles might not sound like the most glamorous part of a tennis court, but honestly, they’re a huge deal. You can have the best LED fixtures in the world, but if your poles are too short, too far apart, or pointed in the wrong direction, your court will end up with uneven lighting, shadows, or glare right where you don’t want it. A well-designed pole setup is what ties the whole lighting system together—functionally and visually.
Pole height is one of the first things to decide. Most outdoor tennis courts use poles between 8 and 12 meters (roughly 26–40 feet) tall. The height you choose depends a lot on your court layout, lighting power, and type of fixtures.
For residential or private courts, poles around 8–9 meters work just fine. They’re easier to install, cheaper, and provide enough light for casual games. However, for club-level or tournament courts, the poles usually go up to 10–12 meters. That extra height helps spread the light more evenly, minimizing harsh shadows near the baseline or center line.
The rule of thumb is simple: the higher the pole, the wider the light coverage and the softer the glare. But of course, higher poles also mean heavier wind loads and slightly higher costs for foundations and materials. So it’s all about finding the right balance between performance and practicality.
Many lighting designers use photometric simulation software to figure out the ideal pole height and fixture angle before installation. These programs can calculate vertical and horizontal illuminance, helping ensure the lighting meets ITF or CIE standards without wasting energy or creating glare.
Pole placement affects everything from brightness distribution to visibility. The most common layout for a single outdoor court is eight poles—four on each side. Each pole usually holds one or two fixtures, depending on the brightness needed.
They’re generally installed a few feet (around 3–5 meters) outside the sidelines and slightly behind the baseline. That way, the lights don’t interfere with players’ view or cause unwanted shadows on the court surface. The beams from opposite sides should overlap slightly at the center, ensuring even illumination across the playing area.
If you have multiple adjacent courts, it’s better to share poles between them—this saves space and creates a more uniform light pattern. For example, two neighboring courts can share the middle poles, with fixtures angled out toward each court.
Avoid placing poles directly behind players’ sightlines, especially near the baseline. Nothing’s worse than looking up for a serve and getting blinded by a floodlight.
Once the poles are in place, the fixture tilt angle matters just as much. Most lighting engineers recommend angling fixtures 15–25 degrees downward. This reduces direct glare, keeps light focused on the playing surface, and avoids spillover into the surroundings.
Too steep of an angle (say 35–40°) can make the light patchy and uneven, while too shallow (under 10°) increases glare and light trespass.
If you’re installing LED floodlights, they usually come with adjustable brackets and asymmetric optics, which make it easier to fine-tune the direction. Take the time to test the layout after installation at night—sometimes just a few degrees of adjustment can make a huge difference in uniformity.
Lighting poles aren’t just tall sticks with lights on top—they’re structural elements that have to stand up to wind, vibration, and sometimes even earthquakes. That’s why foundation design is key.
Most poles are anchored with reinforced concrete footings that go at least 1 meter deep, depending on soil type and pole height. In areas with soft soil or strong winds, foundations might need to be even deeper—sometimes up to 1.5 or 2 meters.
You’ll also want to check your local wind rating before choosing materials. For example, coastal areas or open fields may require poles rated for 120–150 km/h (75–95 mph) wind speeds. Most manufacturers provide engineering data for this, so don’t skip it.
Steel poles are still the most common choice—they’re strong, durable, and cost-effective. Hot-dip galvanized steel resists corrosion well, especially in humid or coastal areas. Aluminum poles are lighter and rust-proof but usually more expensive.
Electrical setup is another thing you shouldn’t cut corners on. Modern LED fixtures require drivers, surge protection devices, and waterproof connectors to function safely.
It’s always best to have a licensed electrician handle wiring and grounding. Proper grounding (using copper rods or grounding grids) prevents electric shock and protects against lightning strikes. Also, make sure all connections are rated IP65 or higher, so they can handle outdoor conditions like rain, dust, and humidity.
If you’re upgrading from metal halide to LED, you might need to rewire or replace old ballasts. LEDs run on constant current drivers, not the old ballast systems, and they’re usually lighter and more compact—making retrofits easier.
Some clubs are also adding smart control systems—basically, an app or timer that lets you dim or switch off lights remotely. It’s convenient and saves power, especially if you rent out courts or host different types of events.
A well-installed lighting system can last 20 years or more, especially with high-quality LED fixtures. The LEDs themselves often have lifespans of 50,000 to 100,000 hours, meaning you could get over a decade of use even with daily evening play.
Still, it’s smart to check the poles and fittings at least once a year. Look for signs of rust, loose bolts, or wiring wear. A quick inspection and occasional cleaning can extend your system’s life and keep the court looking sharp.
And don’t forget about heat management—LEDs perform best when their heat sinks are clean and free from dust. Overheating can reduce their lifespan and brightness over time.
 If your old metal halide or high-pressure sodium lights have started to flicker, hum, or just eat up your electricity bill, you’re definitely not alone. Many tennis clubs and private owners are switching over to LED tennis court lighting these days, and for good reason. LEDs not only make the court brighter and more visually balanced, but they also cut power use dramatically—sometimes by 60–70%. Plus, they last much longer and don’t need the constant maintenance that older systems demand.
So how do you actually go about replacing those old fixtures without messing up your lighting layout or spending too much? Here’s a practical guide to getting it done the right way.
Before jumping into new lights, take a good look at what’s already in place. You’ll need to know a few key details:
Older metal halide lights often range between 1000W and 1500W per fixture, producing around 80,000 to 120,000 lumens when new—but that output can drop by 30–40% after just a few thousand hours of use.
In contrast, modern LED floodlights can deliver the same brightness with only 400–600W, depending on the fixture efficiency (typically 130–160 lumens per watt). That’s a massive difference, and it translates into huge energy savings over time.
Also check the condition of your poles. If they’re structurally sound and not rusting or bending, you can often reuse them and just replace the old fixtures—saving thousands in material and installation costs.
It’s worth measuring your current illuminance levels (in lux) across different court zones—baseline, center, and net—to understand how the new system should perform. You can use a handheld lux meter or have a lighting contractor take readings for you.
Once you know your setup, it’s time to choose your new lights. LEDs come in a wide range of styles and specifications, and not all are built equally. Look for IP65 or higher waterproof ratings, since outdoor tennis courts are constantly exposed to rain, dust, and humidity. For areas with heavy rainfall or coastal air, an IP66 or IP67 rating is even better.
Equally important is optics and beam control. Tennis courts need a uniform spread of light, so choose LEDs with asymmetric beam angles—for example, 30°, 60°, or 90° options—to focus light where it’s needed without creating glare. Some advanced models even allow for custom photometric design, which ensures that every fixture contributes to a balanced illumination across the court.
And don’t forget anti-glare design. Players should be able to track the ball comfortably without being blinded mid-serve. Many top-tier LED tennis lights have glare-reduction visors or optical lenses that soften the light intensity.
If your old poles and mounting brackets are compatible, you can often retrofit the LEDs directly onto them. Manufacturers sometimes offer retrofit kits specifically designed for replacing 1000W or 1500W metal halide lights, making the process much smoother.
Also, check for color temperature and CRI (Color Rendering Index). For tennis courts, a color temperature between 5000K and 5700K and a CRI above 80 ensures that colors look vivid and natural.
Switching from metal halides to LEDs isn’t a simple plug-and-play replacement. Metal halide systems use ballasts to regulate current, while LEDs require drivers—so some electrical adjustments are usually necessary.
A licensed electrician should handle the wiring to make sure the new drivers are compatible with your circuit. Old ballasts will need to be removed, and wiring might be upgraded to handle low-voltage DC drivers if applicable.
It’s also a great time to install surge protectors or lightning arrestors. Outdoor LED systems are sensitive to voltage spikes, and a sudden surge can damage the electronics inside the fixtures. A small investment in surge protection can save you from replacing expensive lights later on.
For added convenience, you can install dimmers, timers, or smart lighting controllers. Imagine being able to lower brightness for casual practice sessions or boost it during tournaments—all from a smartphone or control panel. Some systems can even automate schedules based on daylight sensors, turning lights on only when needed.
The total rewiring and control setup usually takes one to two days for a single court, depending on how complex your system is.
Once everything’s installed, don’t just flip the switch and call it done. Testing is an important part of getting your lighting right.
Take illuminance readings again using a lux meter at multiple points on the court—especially at the baselines, sidelines, and net area. Ideally, the average brightness should match your design goals (for example, 700–800 lux for club play or 1000–1200 lux for competition).
Check the uniformity ratio—you’ll want it to be 0.7 or higher, meaning the light distribution feels even and balanced. If one area feels overly bright or dim, adjust the tilt angles slightly. Sometimes a 2–3 degree change can completely fix unevenness.
It’s also smart to play a short match under the new lights to see how they feel in action. The human eye can pick up differences that instruments might miss—like subtle glare, color inconsistencies, or reflections off the net posts.
A well-done LED replacement can totally transform your court. You’ll notice immediate improvements in clarity and color, and the shadows that used to stretch across the surface will be gone.
Energy consumption usually drops by 60–70%, and since LEDs can last up to 50,000–100,000 hours, you won’t be climbing up ladders to change bulbs every season anymore. That’s roughly 10–15 years of lighting life, even with daily evening play.
You’ll also save on maintenance—no more warm-up times, no more flickering, and no more frequent bulb or ballast replacements. Some facilities report saving over $2,000 per year per court just from energy and maintenance combined.
When you add it all up, the payback period for an LED conversion is typically 2 to 4 years, depending on how often you use the court and your local energy rates. After that, it’s all savings.
Plus, the visual upgrade is huge. LEDs give off cleaner, whiter light, making the court look more professional and modern. And because they don’t emit UV or excessive heat, they’re easier on both your eyes and the court surface.
Replacing old tennis court lights might sound like a big project, but with the right planning, it’s actually pretty straightforward—and the payoff is well worth it. Once you experience that bright, crisp, evenly lit court, you’ll wonder why you didn’t make the switch sooner.
Let’s be honest—tennis court lighting isn’t exactly pocket change. Whether you’re setting up a brand-new court or upgrading an old one, the total cost can swing quite a bit depending on your lighting type, court size, installation complexity, and desired brightness level. But if you break things down, it’s easier to see where the money actually goes and what kind of long-term savings you can expect.
The biggest chunk of your budget will go into the fixtures. For LED tennis court lights, prices vary depending on performance level, brand, and features like optical design or smart control.
For most residential or recreational courts, good-quality LED floodlights typically run between $400 and $800 per fixture. These usually deliver between 40,000 and 70,000 lumens, which is more than enough for casual or semi-competitive play.
If you’re upgrading a club-level or professional court, prices climb to around $1000–$2500 per fixture, but these lights often come with better asymmetric optics, higher CRI (80–90), and advanced glare control. They’re also built with die-cast aluminum housings, corrosion-resistant coatings, and active heat dissipation systems that extend lifespan.
For a standard outdoor tennis court that uses 8 fixtures (4 on each side), you’re looking at about $4000 to $10,000 just for the lights. Some top-tier systems with broadcast-level quality can reach $15,000+, but those are usually overkill for home or club use.
If you opt for solar-powered LED lights, the fixture cost can rise by another 20–30%, but those systems come with built-in panels and batteries—so you save on wiring and electricity later on.
Installation can vary just as much as the fixtures themselves. On average, professional installation runs between $2000 and $5000 per court, depending on how complex your setup is.
If you already have poles and wiring in place (for example, if you’re just upgrading from old metal halide lights), costs will be on the lower end. But if you’re building from scratch—meaning new poles, concrete foundations, trenching for cables, and full electrical connections—you could be looking at $7000–$10,000 in total labor and material.
Pole installation alone can cost $300–$700 per pole, depending on the pole height (8–12 meters) and soil conditions. Adding underground wiring might cost another $5–10 per foot if your court is large or far from the main power supply.
Don’t forget about control systems, too. Simple on/off switches are cheap, but if you want smart lighting (timers, dimmers, or motion sensors), expect an extra $500–$1500 depending on the technology.
Now, let’s talk about what happens after the installation. The running cost is where LED lights really shine (pun intended).
A full LED tennis court setup typically draws 3 to 5 kilowatts (kW) in total, depending on brightness and design. Compare that to older metal halide systems, which often use 10–12 kW for the same amount of usable light.
Here’s what that looks like in everyday terms:
If your electricity rate is around $0.15 per kWh and you play for 3 hours per night, your nightly cost would be about $2.25 for LEDs versus $5–6 for metal halides.
It doesn’t sound like much at first glance, but if you play 5 nights a week for most of the year, that adds up fast.
Let’s do the math:
That’s $800–$1000 in annual savings per court, not even counting the reduced maintenance. Multiply that by a few courts, and the numbers get serious.
Some tennis clubs report that the energy savings alone pay for the LED upgrade within 2–4 years, depending on usage hours and local energy rates.
Maintenance is another area where LEDs win easily. Traditional metal halide lamps need replacements every 2–3 years, since they lose brightness (called lumen depreciation) over time—sometimes dropping 30% after just 5000 hours of use.
LEDs, on the other hand, can last 50,000 to 100,000 hours. Even if you play 3 hours every evening, that’s roughly 15 to 25 years before needing a replacement. That’s a long time of not climbing ladders or hiring maintenance crews.
You also avoid warm-up times—LEDs reach full brightness instantly—plus they don’t flicker, hum, or shift color over time like metal halides. And because LEDs convert more power into light (not heat), they’re far more energy-efficient, saving even more in the long run.
In terms of maintenance costs, a typical metal halide system might cost $500–$800 a year in bulb and ballast replacements, while LEDs usually need less than $100 annually for inspections or cleaning.
Let’s imagine you’re upgrading a single outdoor tennis court from old 1000W metal halides to new 500W LEDs.
| Item | Old System (Metal Halide) | New System (LED) |
|---|---|---|
| Fixtures (8 units) | $4,000 | $6,000 |
| Installation | $3,500 | $3,000 |
| Power Usage (3 hrs/night, $0.15/kWh) | $1,600/year | $700/year |
| Maintenance | $600/year | $100/year |
| Total 10-Year Cost | ≈ $28,000 | ≈ $16,000 |
As energy costs keep climbing and sustainability becomes more than just a buzzword, solar-powered tennis court lights are getting a lot more attention. Whether you’re managing a local club or setting up a private court in your backyard, switching to solar can be a smart way to cut costs over time and reduce your environmental footprint.
The idea is simple but pretty clever: solar lights combine photovoltaic panels, rechargeable batteries, and LED fixtures to create a fully off-grid lighting system. That means your court can shine brightly at night without ever touching the electrical grid. It’s especially handy if your court is built in a remote area where running power lines would be expensive or just plain inconvenient.
Each light fixture or pole typically has its own solar panel mounted on top or nearby. During the day, the panels convert sunlight into electricity, which charges deep-cycle or lithium-ion batteries stored inside a weatherproof box. When the sun goes down, a smart controller automatically switches the lights on, using the stored energy to power high-efficiency LED floodlights through the night.
Modern systems are more reliable than they used to be. High-quality panels can last 20–25 years, and lithium batteries generally run for 5–8 years before needing replacement. The lighting duration depends on how much sunlight your location gets, but most systems are designed for 8–10 hours of illumination per night, with enough battery backup for 2–3 nights in case of cloudy weather.
That means even after a few gray days, you can still enjoy your evening matches without worrying about blackouts or weak lighting.
Once you’ve got a solar lighting setup, your electricity bills drop to zero. No monthly costs, no complicated wiring, no dependence on the local power grid. You’re producing your own energy every single day, which feels pretty good, especially in places with steady sunshine.
Another nice perk is energy independence. If there’s ever a power outage, your court lights won’t even blink. They’ll keep running off stored solar energy while everything else in the area goes dark. That’s a big deal for clubs that host night tournaments or events—no interruptions, no rescheduling headaches.
From an environmental standpoint, solar lights are one of the cleanest upgrades you can make. They use renewable energy, emit no carbon, and eliminate the need for long underground cables or high-voltage connections. For community courts, schools, or eco-conscious clubs, that’s a great message to share with players and sponsors alike.
Plus, because solar setups don’t rely on external wiring, installation is usually faster and less invasive. No trenching, no rewiring—just mount the poles, align the panels, and you’re good to go.
Of course, it’s not all sunshine and savings right out of the gate. Solar-powered tennis court lights do cost more upfront. On average, they’re about 20–30% more expensive than regular LED systems.
For a single-court installation that might normally cost $8,000 for standard LED lighting, a comparable solar setup could land around $10,000–$12,000. That’s mostly because of the panels and battery packs, which make up nearly half the total cost.
However, when you look at the long-term numbers, the difference tends to balance out pretty quickly. With zero electricity bills and minimal maintenance, many owners see a return on investment within 4–6 years, especially in areas with high energy prices or plenty of sun exposure. After that, it’s essentially free lighting for the rest of the system’s lifespan.
Solar lighting isn’t a one-size-fits-all solution. The biggest factor is location. If you’re in a region with consistent sunlight—say, southern California, Florida, Australia, or southern Europe—solar lighting works beautifully. But if you’re in a place with long winters, short daylight hours, or lots of rain, you might need larger panels and higher-capacity batteries to make up for the difference.
Battery storage is another big one. A well-sized system should offer at least 2–3 days of autonomy, meaning it can run for a couple of nights without full sun. Cutting corners on battery capacity often leads to dim or inconsistent lighting, especially after bad weather.
Also, think about maintenance access. Even though solar systems are low-maintenance, panels should be cleaned a few times a year to remove dust, leaves, or bird droppings—anything that can block sunlight and lower efficiency.
If you’re near the coast or in a humid area, make sure the fixtures and battery enclosures are rated IP66 or higher to resist moisture and corrosion. Stainless steel or powder-coated aluminum poles also last longer in those conditions.
Solar tennis court lighting makes the most sense in areas with limited grid access or high electricity costs. For example, installing underground power lines can cost anywhere from $15 to $40 per foot, which adds up fast if your court is far from your home or clubhouse. In those cases, solar ends up being cheaper and easier in the long run.
It’s also a smart choice for community projects or schools that want to promote sustainability. Some local governments even offer rebates or tax incentives for solar-powered sports facilities, which can help offset that higher upfront price.
Let’s say you install an 8-pole solar LED lighting system for a single outdoor court in Arizona. Each fixture has a 200W LED lamp, powered by a 400W solar panel and a 1.2kWh lithium battery.
Over that 20-year period, you might save $10,000–$15,000 compared to a grid-powered LED setup, especially with rising energy rates.
For many players and facility owners, yes—it definitely can be. Solar lighting systems offer a blend of sustainability, independence, and long-term savings that’s hard to ignore. Sure, the initial cost is higher, but if your location gets plenty of sun and you’re tired of monthly energy bills, the switch to solar can be one of the best upgrades you’ll ever make to your court.
Besides, there’s something undeniably satisfying about playing under the night sky, knowing that every serve, volley, and backhand is powered by the sun from earlier that day.
Choosing the right lighting setup for your tennis court isn’t just about making it bright—it’s really about finding that sweet spot between performance, durability, and comfort. A well-lit court feels professional, looks great, and keeps every rally clear and enjoyable, whether you’re hitting a few casual serves or hosting a competitive match under the lights.
There are a few things worth paying close attention to when you’re shopping around for tennis court lights. Even if two products look similar on paper, the difference in quality, optical design, and lifespan can be huge.
One of the first numbers to check is the lumen-per-watt ratio (lm/W). This tells you how much visible light the fixture produces for every watt of electricity it uses. The higher the ratio, the more efficient the light.
For modern LED tennis court lights, aim for 130–160 lm/W if you want good energy performance. That means you’ll get the same brightness using less power compared to older or cheaper LEDs. Some premium models even push 170 lm/W, which can trim your energy costs even further over time.
For example, if your court requires around 120,000 lumens, a 150 lm/W fixture would only need about 800 watts total, while a 100 lm/W fixture would need 1200 watts. That’s a pretty noticeable difference on your electric bill every month.
Good lighting isn’t just about power—it’s about where that light goes. The beam angle determines how the light spreads across the court, and choosing the right one can make a big difference in uniformity and glare.
High-quality tennis court lights usually offer multiple beam angle options, such as 30°, 60°, or 90°. Narrower beams (30°) focus light on specific zones, great for higher poles or precise illumination. Wider beams (60° or 90°) spread the light more evenly and are better suited for smaller courts or lower pole heights.
Some LED fixtures use asymmetric beam patterns, which throw more light forward and less behind the pole. That’s perfect for tennis, since it helps reduce glare in players’ eyes while keeping the court surface evenly lit.
If possible, check whether the fixtures are designed using photometric simulations (IES files). These simulations show how the light will actually distribute across your court—so you can visualize brightness levels before even buying.
Outdoor lighting has to deal with a lot—rain, wind, dust, heat, even the occasional tennis ball hit. That’s why durability matters as much as brightness.
Look for lights with an IP65 or higher rating. IP65 means the fixture is completely dust-tight and protected against water jets, making it suitable for year-round outdoor use. In coastal or humid areas, going up to IP66 or IP67 is even better for long-term reliability.
Impact resistance is measured by the IK rating, and a score of IK08 or above means the housing can withstand knocks from stray balls or mild vandalism. Combine that with a solid aluminum heat sink and corrosion-resistant coating, and you’ve got a fixture that’ll last through years of heavy use and tough weather.
Many top-quality LED court lights can easily reach a lifespan of 50,000 to 100,000 hours, which roughly translates to 15 to 20 years of typical evening play.
It might sound boring, but a good warranty can save you a ton of trouble later. A manufacturer offering 5 to 7 years of warranty coverage is usually confident in their product’s build quality and LED chip performance.
Be cautious of ultra-cheap or unbranded lights that come with vague or short warranties. You might save money upfront, but if one fails after a season or two, replacing it (and redoing the wiring or lift work) can cost more in the long run.
It’s also worth checking if the manufacturer provides technical support or replacement parts. Being able to replace a driver or lens instead of the entire fixture is a big plus.
Brightness alone doesn’t equal a good playing experience. You also want lighting that feels comfortable on the eyes. The best tennis court lights use anti-glare optics, diffused lenses, or asymmetric reflectors to keep light focused on the court without blinding players or disturbing nearby homes.
Color rendering also plays a role. Look for a CRI (Color Rendering Index) of 80 or higher, which helps colors—like yellow tennis balls or white lines—appear more natural and vivid.
In terms of control, newer systems often come with smart lighting features, letting you dim or adjust brightness levels using an app, remote, or timer. For example, you can set a lower brightness (maybe 50%) for casual practice sessions, and bump it up to full intensity for matches or events. That not only saves power but also extends the life of your LEDs.
Some setups even offer motion sensors or automated schedules, which can turn the lights on at dusk and off after inactivity—perfect for community courts or clubs that want to save energy without constant monitoring.
Lighting isn’t purely functional—it adds to the court’s atmosphere too. Sleek, modern fixtures with slim profiles and clean finishes tend to look more professional and blend nicely with most environments. If you’re lighting multiple courts, matching the fixture design across all of them gives a more cohesive look.
For clubs or resorts, consider color temperature consistency as well. Sticking to one tone (say, a neutral 5000K white) ensures the lighting feels uniform and balanced from every court. Mixing color temperatures can make one court look dimmer or “off” compared to another.
Good tennis court lighting isn’t just about visibility—it changes how the whole game feels. When the court is evenly lit, colors pop, and players can focus on their swings instead of squinting at the glare. Whether you’re upgrading from old halides, installing a brand-new system, or exploring solar power, the goal is the same: clear, balanced, and comfortable lighting that enhances every serve and rally.
With today’s LED and solar options, you don’t need a massive budget to achieve that. A smart layout, quality fixtures, and proper installation can give you a setup that looks professional and lasts for years—so you can enjoy your game long after the sun goes down.